Title: Vishwaroopam 2013- - A Kamal Hassan Action Thriller
Release Date: 25 January 2013 Starring: Kamal Hassan
The hindi title is Vishwaroop for Vishwaroopam tamil film. The
film is shot in both language simultaneously which is a great for us as
we will see this film in hindi without any dubbing. Vishwaroopam 2013
tamil most talked about upcoming picture as it is lead by Kamal Hasan which is a spy thriller film.
Vishwaroopam star cast:
Director: Kamal Haasan
Music by: Shankar-Ehsaan-Loy
Studio: Raaj Kamal Films International
Release date: 11 January 2013
Country: India
Language: Tamil, Hindi
Video Length: Unknown
Video quality: dVDRIP/HD/HQ
Among the many changes coming with Windows 8
and new computers designed for it is a change in the way we access our
computers’ BIOS. No longer do we press a certain key during the boot
process to reveal the BIOS – instead, an option to access the BIOS is
located in Windows 8’s boot options menu.
Traditionally, computers
displayed a message like “Press F2 to enter setup” at the beginning of
the boot process. Pressing this key entered the computer’s BIOS.
However, Windows 8 hardware uses the UEFI replacement for the
traditional BIOS, like Macs do. Some solid-state drive-equipped
Windows 8 PCs boot so fast that you’d only have a 200 millisecond
(that’s 0.2 seconds) window of opportunity to press the key combination.
Windows 8 Hardware vs. Old Computers With Windows 8
Note that this new method only applies if you purchased a new computer with Windows 8 preinstalled
– these will use UEFI. However, if you’ve installed Windows 8 on an
existing computer that uses the legacy BIOS system, you’ll access the
BIOS in the same way as always by pressing the key that appears during
your boot process.
This key is often F2 or Delete, but it can also
be other keys. The exact key depends on your computer – if you don’t
see the appropriate key displayed on your screen during the boot-up
process, consult your computer’s manual.
Accessing Boot Options
There are several ways to access Windows 8’s boot options menu. The easiest one to find is in the PC Settings application – press WinKey+C to reveal the Charms bar, click Settings, and select Change PC settings to access it.
In
the PC Settings application, select the General category and click the
Restart now button under Advanced startup. Your computer will restart
and you’ll enter the Windows 8s boot options menu, where you can access
the UEFI BIOS and change other settings.
You can also hold Shift while clicking Restart in the Shut Down menu
to restart your computer into the boot options menu. This is a quick
way to restart into the boot options menu, as you can access the Shut
Down button from the Charms anywhere on your system. Command-line geeks will be happy to know they can run a special shutdown.exe command in a Command Prompt window to restart their computer directly into the boot options menu:
Shutdown.exe /r /o
Accessing UEFI BIOS
The
boot options menu has been designed to integrate some commonly used
options that people went into the BIOS for. For example, if you want to
boot your computer off a USB drive, DVD or CD, or another device, you
can click the Use a device tile in the boot options menu and select the
device you want to boot from.
If you’re just here to access your computer’s UEFI BIOS, click the Troubleshoot tile.
This
will reveal an Advanced Options screen with a variety of tools – the
UEFI Firmware Settings tile will take you to your computer’s BIOS. (On
UEFI, which stands for “Unified Extensible Firmware Interface”, the
firmware settings menu is equivalent to a traditional PC’s BIOS.)
If
you don’t see the UEFI Firmware Settings tile here, your computer
doesn’t use UEFI. You’ll need to access the BIOS in the traditional way,
by pressing a specific key during the boot-up process. See the first
section above for more information.
If there’s an error booting
Windows, you won’t be locked out of the BIOS — the boot options screen
will appear when you start your computer. From here, you can repair
Windows or enter your BIOS.
Why the Change?
While this may
be slightly inconvenient, as there’s no way to access the BIOS in
normal use without booting into Windows first, it’s surely necessary. Microsoft’s blog post about this
on the Building Windows 8 blog describes how this new system came to
be. With the increased boot speed, some systems had a less than 200
millisecond window of opportunity to press a key. Even the best
key-tappers at Microsoft could only press a key once every 250ms — to
access the BIOS, frantic tapping, luck, and several compuer reboots were
all necessary.
This also brings some much-needed consistency to
Windows 8 computers — they’ll all have a consistent way of accessing the
BIOS. Currently, different computers use different keys at start-up.
While Windows 8 may have some questionable design decisions
that some people will dislike, this shouldn’t be one of them. The new
method of accessing the BIOS is necessary and well-implemented.
You’ve always got a trusty bootable USB flash drive with you to solve
computer problems, but what if a PC’s BIOS won’t let you boot from USB?
We’ll show you how to make a CD or floppy disk that will let you boot
from your USB drive.
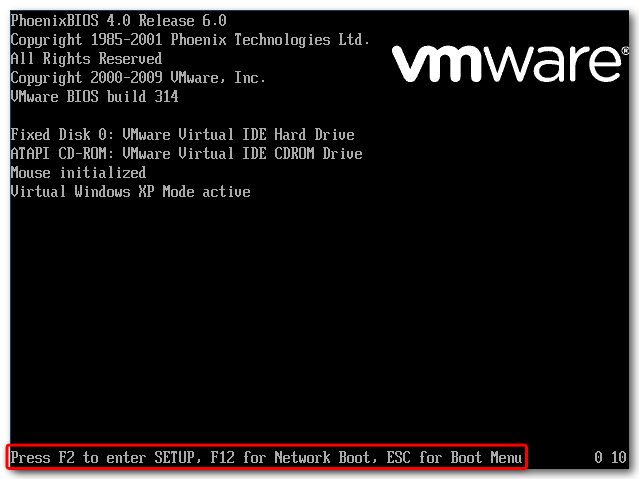
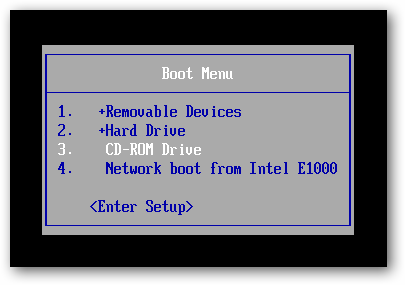
This boot menu, like many created before USB drives became cheap and
commonplace, does not include an option to boot from a USB drive.
A piece of freeware called PLoP Boot Manager solves this problem,
offering an image that can burned to a CD or put on a floppy disk, and
enables you to boot to a variety of devices, including USB drives. Put PLoP on a CD
PLoP comes as a zip file, which includes a variety of files. To put
PLoP on a CD, you will need either plpbt.iso or plpbtnoemul.iso from
that zip file. Either disc image should work on most computers, though
if in doubt plpbtnoemul.iso should work “everywhere,” according to the
readme included with PLoP Boot Manager. Burn plpbtnoemul.iso or plpbt.iso to a CD and then skip to the “booting PLoP Boot Manager” section.
Put PLoP on a Floppy Disk
If your computer is old enough to still have a floppy drive, then you
will need to put the contents of the plpbt.img image file found in
PLoP’s zip file on a floppy disk.
To do this, we’ll use a freeware utility called RawWrite for Windows.
We aren’t fortunate enough to have a floppy drive installed, but if
you do it should be listed in the Floppy drive drop-down box. Select
your floppy drive, then click on the “…” button and browse to plpbt.img.
Press the Write button to write PLoP boot manager to your floppy disk. Booting PLoP Boot Manager
To boot PLoP, you will need to have your CD or floppy drive boot with
higher precedence than your hard drive. In many cases, especially with
floppy disks, this is done by default.
If the CD or floppy drive is not set to boot first, then you will
need to access your BIOS’s boot menu, or the setup menu. The exact steps
to do this vary depending on your BIOS – to get a detailed description
of the process, search for your motherboard’s manual (or your laptop’s
manual if you’re working with a laptop).
In general, however, as the computer boots up, some important
keyboard strokes are noted somewhere prominent on the screen. In our
case, they are at the bottom of the screen.
Press Escape to bring up the Boot Menu. Previously, we burned a CD
with PLoP Boot Manager on it, so we will select the CD-ROM Drive option
and hit Enter.
If your BIOS does not have a Boot Menu, then you will need to access
the Setup menu and change the boot order to give the floppy disk or
CD-ROM Drive higher precedence than the hard drive. Usually this setting
is found in the “Boot” or “Advanced” section of the Setup menu.
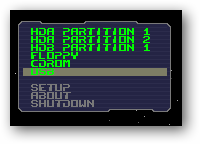
If done correctly, PLoP Boot Manager will load up, giving a number of boot options.
Highlight USB and press Enter.
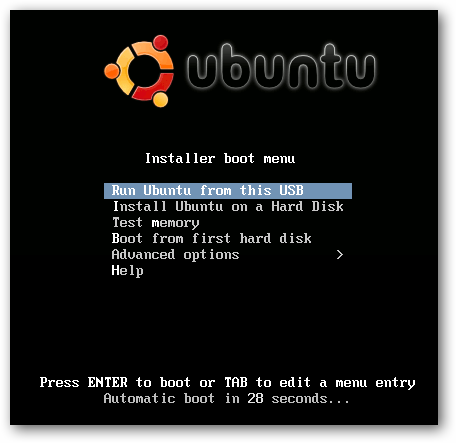
PLoP begins loading from the USB drive.
Despite our BIOS not having the option, we’re now booting using the USB drive, which in our case holds an Ubuntu Live CD!
This is a pretty geeky way to get your PC to boot from a USB…provided
your computer still has a floppy drive. Of course if your BIOS won’t
boot from a USB it probably has one…or you really need to update it. Download PLoP Boot Manager Download RawWrite for Windows
Please Donate Something to Continue My Free Service
Desclaimer
Neither this site nor the author is endorsing the unethical use of hacking, cracking or any such activities. This site is only for educational purposes.All downloaded are from third party side. This site will hold no responsibility for your actions. It serves as a source of information only.....If you Found anything illegal, Please mail to me rafomac@rafomac.com.............by rafomac