Want to
extend your computers WiFi Internet to another device via
ethernet cable? We have the solution! This works to connect
up X-Box, PS3, and other devices like WiFi Radios.
Microsoft has a functionality called Internet Connection Sharing (ICS) that is made just for this purpose. If the solution below does not answer your question then do some Googling on "ICS", there is a ton more info out there on this topic.
We will be using Windows 7, but earlier versions are similar. Be sure your Windows 7 computer is already connected to the Internet via wireless before you start.
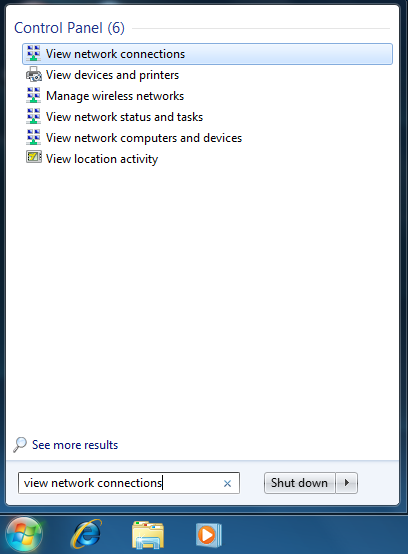
Click the Windows icon and type "view network connections", then hit "Enter" on your keyboard.
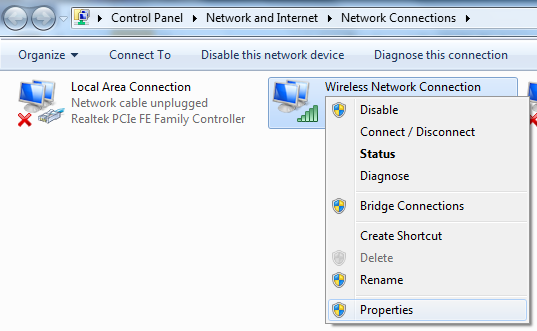
Right-click on the icon that represents your wireless connection to the internet, then left-click on "Properties"
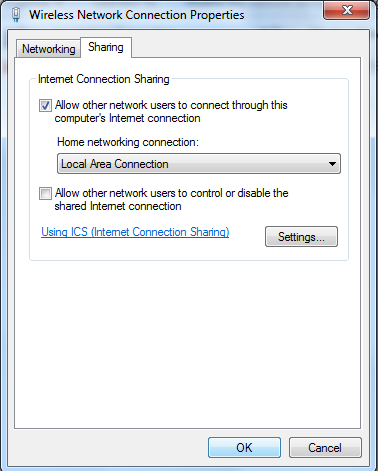
Go to the "Sharing" tab and check the top box, then choose "Local Area Connection" from the drop down below. No need to check the second box. Just press "OK" at the bottom of the screen.

When everything is ready to go you
will see the word "Shared" under your wireless
connection to the Internet. Its sharing with your
computers ethernet port (also called "Local Area
Connection" on this screen).
Now you can connect an ethernet cable to your computers ethernet port and share internet to a second device.
Note: To return normal ethernet port functionality to your computer, just repeat the above and uncheck the top box, then press "OK"
Microsoft has a functionality called Internet Connection Sharing (ICS) that is made just for this purpose. If the solution below does not answer your question then do some Googling on "ICS", there is a ton more info out there on this topic.
We will be using Windows 7, but earlier versions are similar. Be sure your Windows 7 computer is already connected to the Internet via wireless before you start.
 |
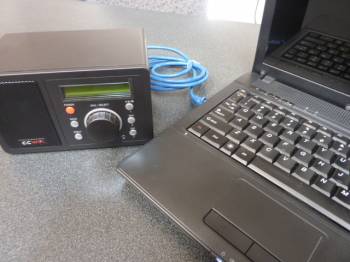 CC WiFi Radio connected to a Window 7 Laptop |
Click the Windows icon and type "view network connections", then hit "Enter" on your keyboard.
Right-click on the icon that represents your wireless connection to the internet, then left-click on "Properties"
Go to the "Sharing" tab and check the top box, then choose "Local Area Connection" from the drop down below. No need to check the second box. Just press "OK" at the bottom of the screen.
Now you can connect an ethernet cable to your computers ethernet port and share internet to a second device.
Note: To return normal ethernet port functionality to your computer, just repeat the above and uncheck the top box, then press "OK"