


In this guide I explain how to replace the keyboard on a MacBook Pro 13-inch (Late 2011).
According to Apple, the keyboard is part of the palmrest assembly and if the keyboard fails, the entire palmrest assembly has to be replaced.
This is not 100% correct. Of course, you can buy a new palmrest/keyboard/trackpad assembly and replace the whole thing but it’s possible to replace just the keyboard itself.
For this repair you’ll need the following tools:
- T6 torx screwdriver.
- PH0 Phillips screwdriver.
- PH00 Phillips screwdriver.
Also, I would recommend making notes of all removed screws (they all have different length). It will help greatly during the reassembly process.
Before you start, make sure the computer is turned off.
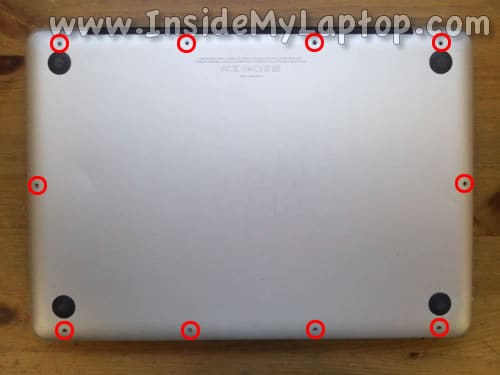
STEP 1.
Remove all screws from the bottom cover. Lift up and remove the bottom cover.
STEP 2.
You can leave the battery attached to the case but it’s necessary to unplug it from the logic board.
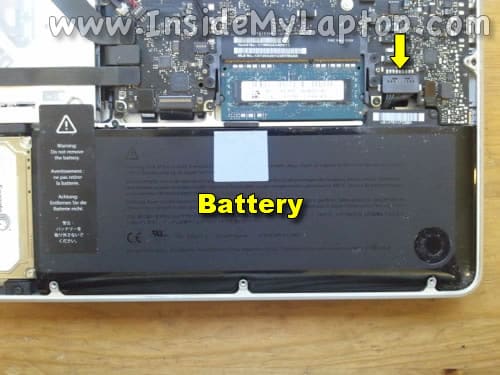
Disconnect the battery cable from the logic board.

STEP 3.
Remove three screws securing the cooling fan.
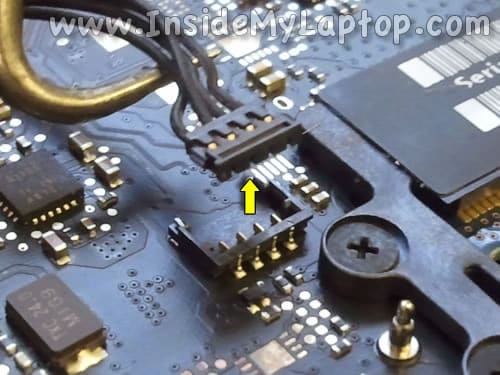
Disconnect the fan cable from the logic board.
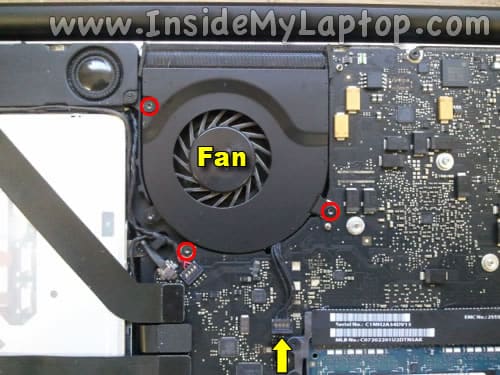
Here’s how to disconnect the fan cable.
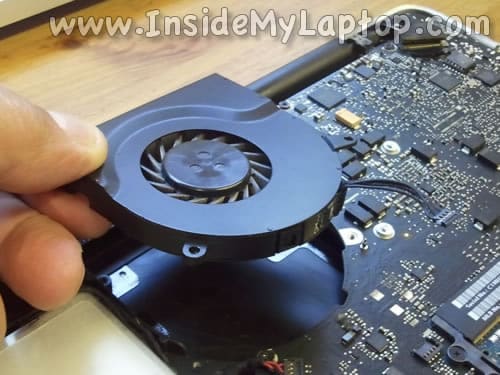
STEP 4.
Remove the cooling fan.
STEP 5.
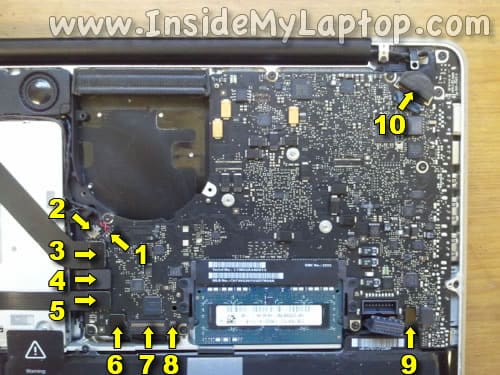
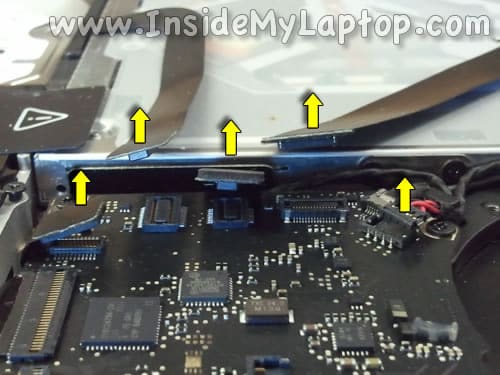
Now we’ll have to disconnect all other cables from the logic board. I will show how to disconnect them in the following steps.
Cables to disconnect:
1. Speaker/subwoofer cable.
2. Camera cable.
3. AirPort/Bluetooth cable.
4. Optical drive cable.
5. Hard drive cable.
6. Trackpad cable.
7. Keyboard cable.
8. Keyboard backlight cable.
9. Battery indicator light cable.
10. Display video cable.
Here’s how to disconnect the display video cable connector.
Lift up the metal retainer securing the connector and disconnect the cable from the logic board by the black tab.
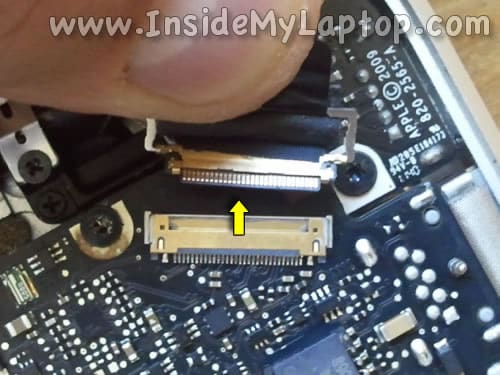
Connectors 1, 3, 4, 5, 6 and 9 disconnect the same way.
Simply lift up the connector and unplug it from the logic board.
Here’s how to unplug the camera cable.

You have to be very careful with the keyboard and backlight connectors. They are fragile.
Here’s how to unlock the connectors.
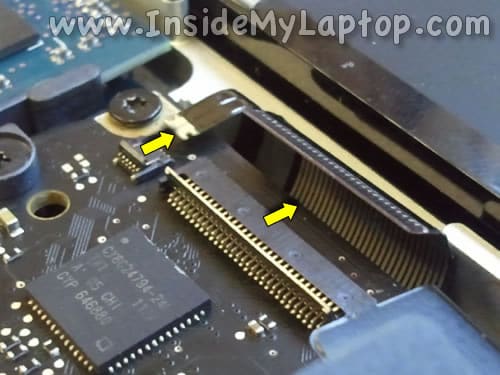
Lift up the retainer with your fingernail. The retainer will open up at a 90 degree angle.
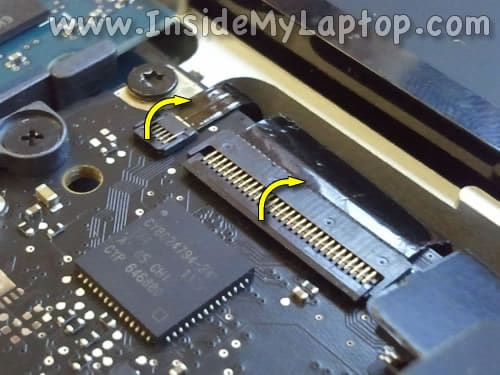
After both connectors unlocked, you can pull cables from the connectors.
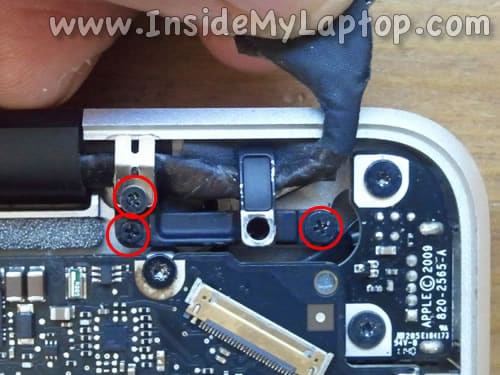
STEP 6.
Remove three screws securing the silver grounding plate and display cable retainer.
Remove the grounding plate.
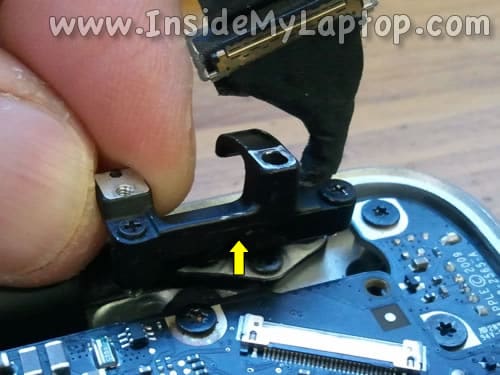
STEP 7.
Remove the display cable retaining bracket.
STEP 8.
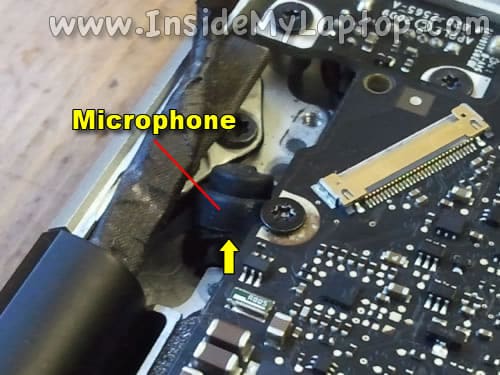
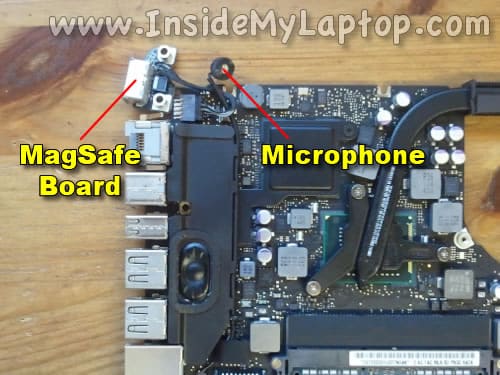
Here’s a tricky part.
In this MacBook Pro the microphone is glued to the palmrest assembly.
It’s possible to lift up the logic board, unplug the microphone cable, unroute the cable and remove the logic board without separating the microphone from the logic board BUT… it will be very difficult to install the logic board back into the laptop and connect the microphone cable. You might easily damage the microphone cable connector during this procedure.
Here’s an easy way.
Using a sharp object carefully unglue the microphone from the palmrest assembly.
Most likely it will not come out clean and some sticky tape and cushion rubber will remain attached to the cover but that’s OK.
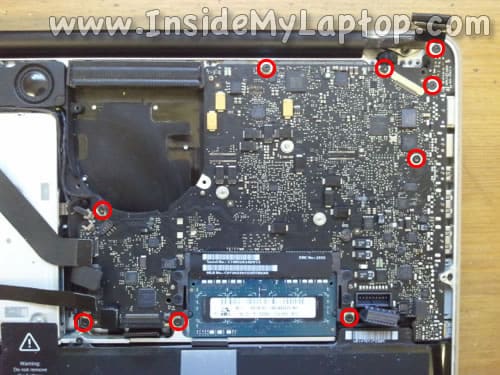
STEP 9.
Remove all screws securing the logic board and MagSafe board (power connector board).
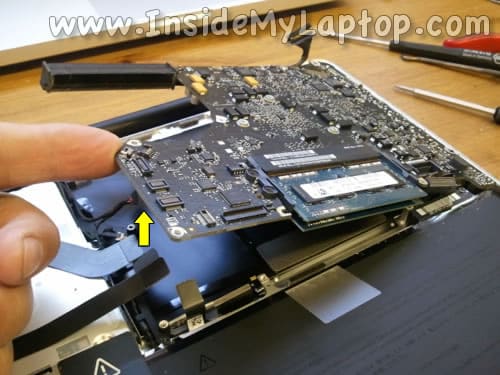
STEP 10.
Start separating the logic board from the palmrest assembly.
STEP 11.
Remove the logic board.
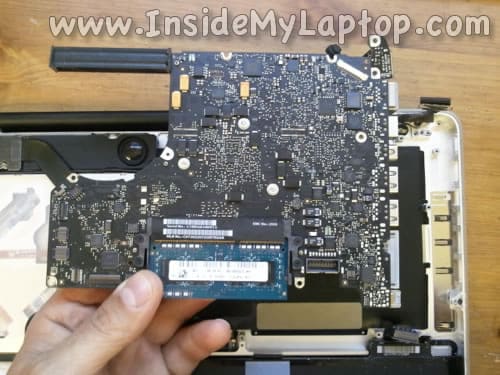
STEP 12.
The logic board was removed with the MagSafe board and microphone attached to it.
Now you can see why we separated the microphone from the palmrest assembly in the step 8.
The microphone cable routed very tightly and hard to access.
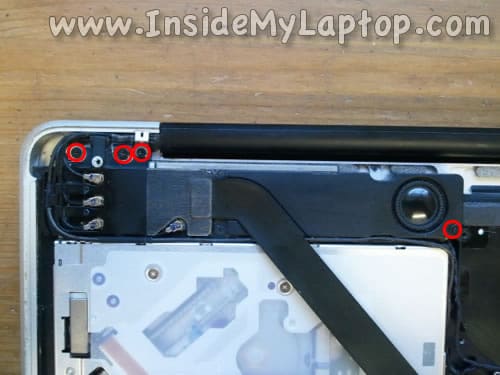
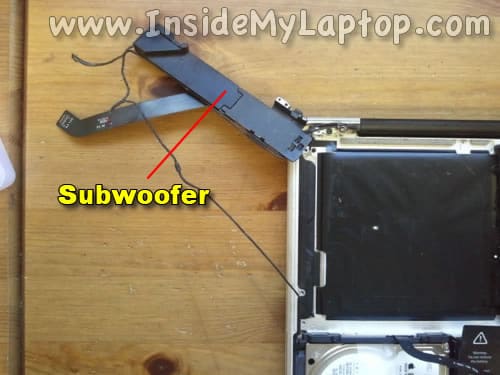
STEP 13.
Remove four screws securing the AirPort/Bluetooth/speaker assembly.
STEP 14.
Move the assembly a little bit to the right so you can access one screw securing the optical drive.
Remove the screw.

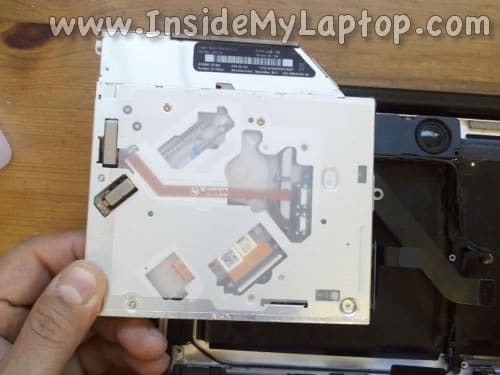
STEP 15.
Remove two more screws securing the optical drive.
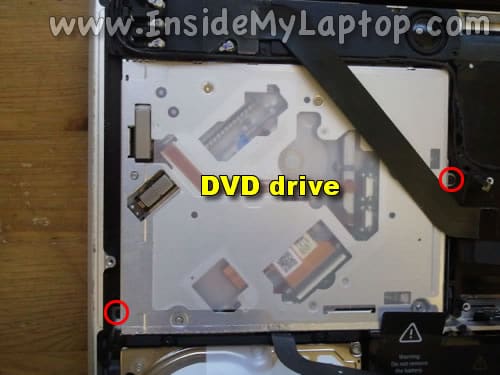
STEP 16.
Remove the optical drive.
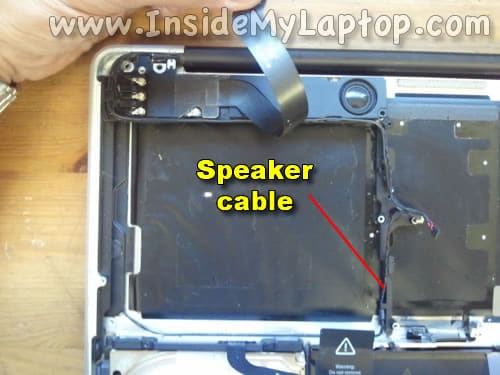
STEP 17.
Unroute the speaker cable from the center bracket.
STEP 18.
Move the AirPort/Bluetooth/speaker assembly aside.
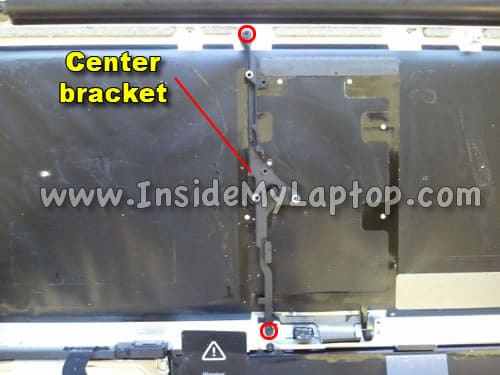
STEP 19.
Remove two screws securing the center bracket.
Lift up and remove the center bracket.
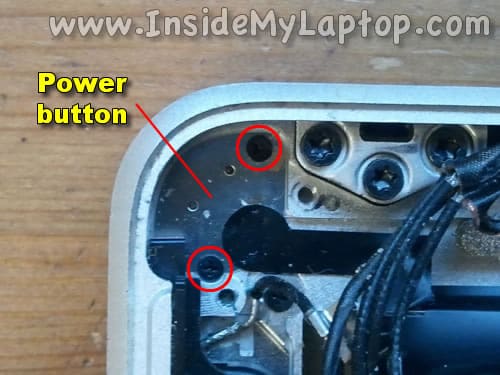
STEP 20.
Remove two screws securing the power button to the palmrest assembly.
STEP 21.
Lift up the power button.
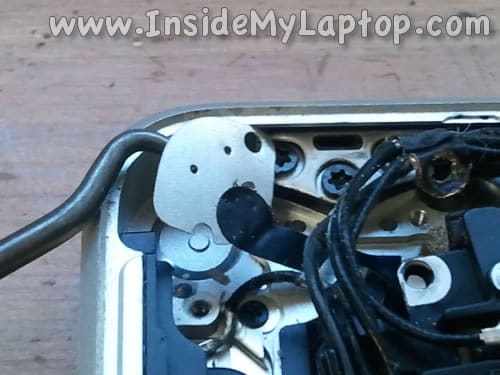
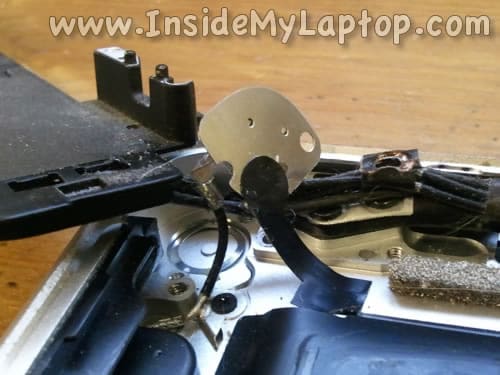
STEP 22.
The power button cable routed under other cables.
Unroute the power button cable.
NOTE: the power button is part of the keyboard. When you remove the keyboard the power button also has to be removed.
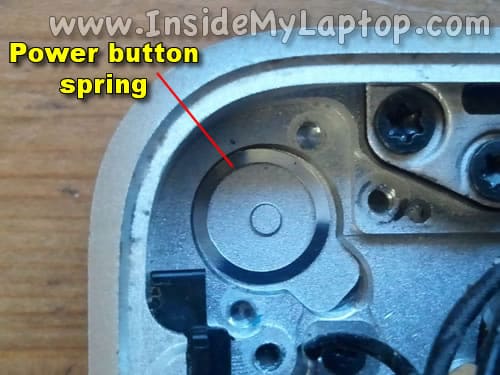
There is a silver spring located under the power button. Do not lose the spring.
Make sure the spring is in place when you install the new power button/keyboard.
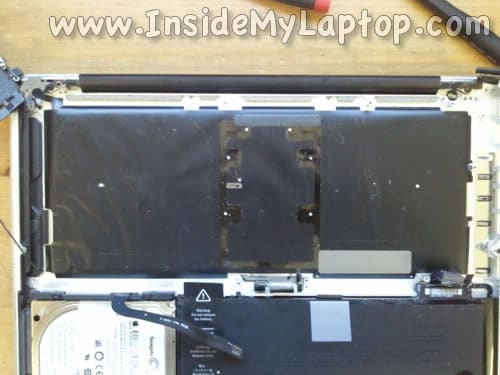
STEP 23.
Now the keyboard and backlight ready for the removal.
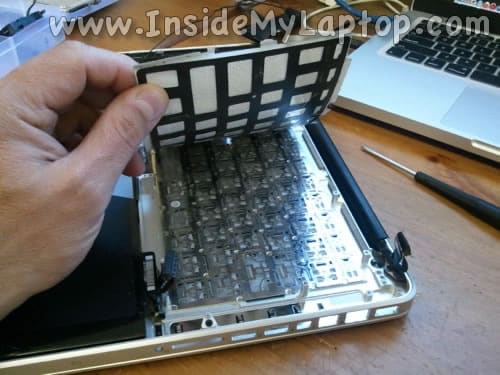
STEP 24.
Start separating the old backlight from the keyboard/plamrest assembly.

The backlight has a few layers. If you plan to reuse the bakclight, make sure those layers don’t get separated.
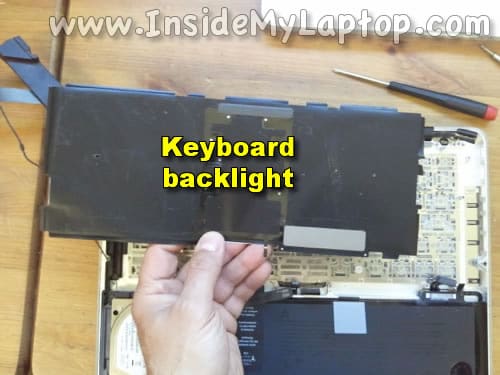
STEP 25.
The keyboard backlight removed.
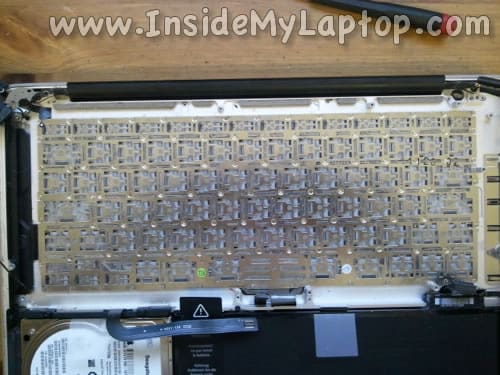
STEP 26.
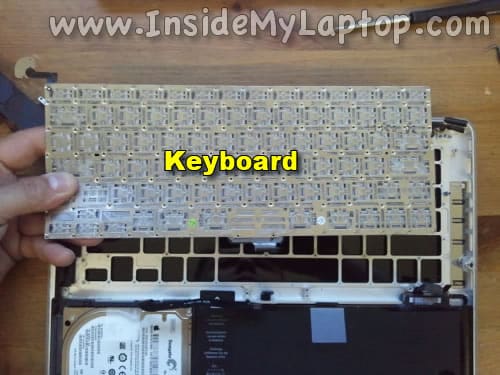
Now you are ready for the keyboard removal.
There are many tiny screws (about 60) securing the keyboard to the palmrest assembly.
Remove all screws.
STEP 27.
Now you can remove the old failed or damaged keyboard and replace it with a new one.
Assemble the laptop following all steps in the reverse direction.
By the way, sometimes it’s possible to repair damaged keyboard keys instead of replacing the entire keyboard.
When I replace the keyboard I always replace the backlight too. It’s easier to install a new backlight than reuse the old one.
It looks cleaner and sticks better to the new keyboard and palmrest assembly.
New replacement keyboards (with or without backlight) for MacBook Pro 13-inch available on eBay.

By the way, if the keyboard failed because of liquid spill, you should go though the liquid spill diagnostic first.
9 comments :
thanks (y)
Thanks for sharing this informative content on networking. The people who have suffficient knowledge about the networking can start preparing for CCNA. The basic knowledge about the routing algorithm, subnetting and switching adds advantage of learning CCNA.
ccna course in Chennai | ccna training in Chennai
I have read your post.Your presentation is nice and it gives some information to me. CCNA certification is one of the most recognized and popular IT Certification today.FITA offers a world class training on CCNA.Start doing the course in CCNA field and get a bright career.
Regards,
ccna course in Chennai | ccna training center in chennai | ccna training chennai
Excellent post with good steps for replacing the keyboard on Mac book. Good to see this and I found your website via Google. Keep posting stuff like this.
Software Testing Training in chennai | Digital Marketing Training in Chennai | SEO Training in Chennai
mmorpg oyunlar
instagram takipçi satın al
tiktok jeton hilesi
Tiktok jeton hilesi
Saç ekim antalya
Referans Kimliği Nedir
İnstagram takipçi satın al
Metin2 pvp serverler
Takipci satın al
perde modelleri
NUMARA ONAY
Turkcell Mobil Ödeme Bozdurma
nft nasıl alınır
ankara evden eve nakliyat
Trafik sigortası
Dedektor
websitesi kurma
aşk kitapları
smm panel
smm panel
iş ilanları
instagram takipçi satın al
HIRDAVAT
Www.beyazesyateknikservisi.com.tr
SERVİS
Tiktok Jeton Hilesi İndir
mardin
balıkesir
bandırma
kağıthane
gölcük
5XH0
salt likit
salt likit
PİF7ZC
Post a Comment
Please Write Your Comments Here....